Paper flowers are one of the most popular and versatile crafts you can make. From simple decorations to intricate arrangements, tissue paper flowers offer a fun and inexpensive way to create vibrant, eye-catching designs for various occasions. Whether you’re preparing for a birthday party, a wedding, or just looking for a creative project, paper flowers are an excellent choice for all ages and skill levels.
In this article, we will explore everything you need to know about tissue flowers, including their history, how to make them, and creative ideas for using them in decorations and gifts. With a few basic materials and a bit of time, you can craft stunning tissue flowers that will brighten up any space.
What Are Tissue Paper Flowers?
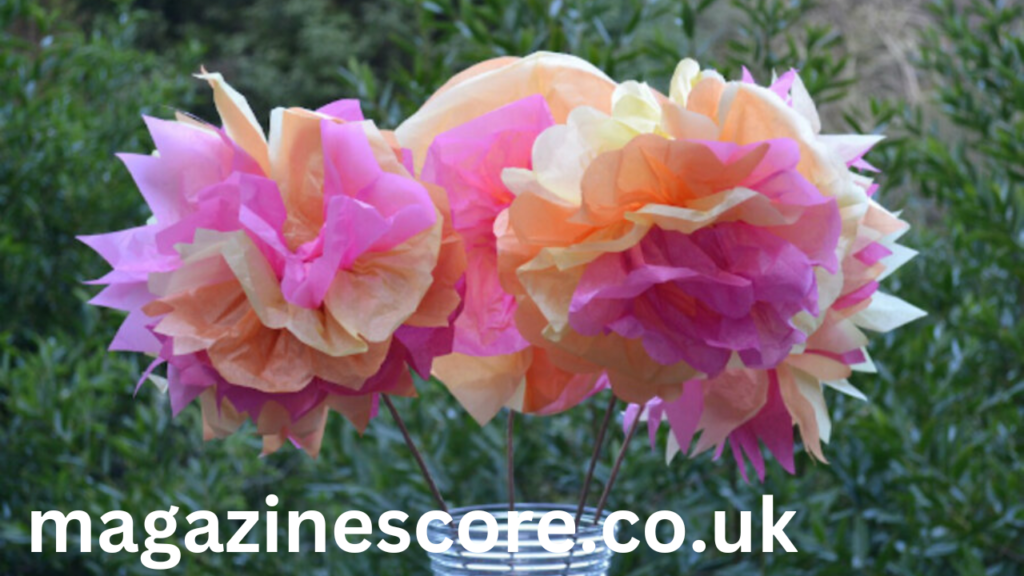
Paper flowers are decorative flowers made by layering and shaping colored tissue paper. They are typically used for home decor, event decorations, and crafts. The petals of the flowers are made by folding and cutting the tissue paper into different shapes, then fluffing them out to create a 3D effect. Tissue paper flowers can be made in a wide variety of shapes, sizes, and colors, and they are often used for festivals, parties, weddings, and other celebrations.
The beauty of paper flowers lies in their simplicity and versatility. With a few basic materials, you can create anything from a single flower to a whole bouquet, making them perfect for DIY projects, craft parties, or as unique gifts.
The History of Paper Flowers
Tissue flowers have a rich history that dates back to ancient civilizations. The use of paper to create decorative objects can be traced to China, where early paper-making techniques were developed. However, it wasn’t until the 19th and 20th centuries that paper flowers became popular in the United States and other parts of the world.
The Mexican tradition of creating colorful paper flowers, known as “papel picado,” has been a significant influence in the widespread use of paper flowers in the celebration of Día de los Muertos (Day of the Dead) and other festivals. Over time, these flowers began to be used for various occasions, including weddings, birthdays, and community events, becoming a symbol of creativity, joy, and celebration.
As paper crafting evolved, tissue flowers gained popularity in the DIY craft world, particularly in the 1970s, when people started experimenting with tissue paper to create home decor and craft items. Today, paper flowers are widely recognized as a staple in modern crafting and decoration.
Previous article; How to Open a Locker From Combination to Fingerprint
Why Choose Tissue Paper Flowers?
There are many reasons why paper flowers are so beloved by crafters. Here are just a few:
- Affordability: Tissue paper is inexpensive and readily available at most craft stores, making it an accessible material for any project.
- Simplicity: Making tissue flowers is easy, even for beginners. The techniques can be learned quickly, and the results are always impressive.
- Versatility: Tissue flowers can be customized in any color or shape, making them ideal for various occasions, from casual get-togethers to formal events.
- Recyclability: Tissue paper can often be reused or recycled, making it an environmentally friendly craft option.
- Durability: Once made, paper flowers are surprisingly durable. They can last for months or even years if stored properly, and they can be reused in future decorations or crafts.
- Customization: Tissue flowers allow for endless customization. You can create flowers that look like roses, daisies, carnations, or any other flower you like.
Materials Needed to Make Paper Flowers
Making paper flowers is simple and requires only a few basic materials. Here’s a list of the essential items you’ll need:
- Tissue Paper: The main material for your flowers. You can find tissue paper in a wide range of colors, patterns, and textures.
- Scissors: For cutting the tissue paper into the appropriate shapes.
- Pipe Cleaners: Used to secure the center of the flower and act as the stem.
- Floral Wire (Optional): For extra stability and a more polished look, especially if you’re making large flower arrangements.
- Ruler (Optional): Helps with measuring and cutting tissue paper into even sizes.
- Glue (Optional): Some designs may require glue to hold the layers of tissue paper together, especially if you’re creating a more intricate flower.
Step-by-Step Guide to Making Paper Flowers
Now that you’re familiar with the basic materials, let’s walk through how to make paper flowers.
1. Preparing the Tissue Paper
Start by selecting the colors of tissue paper you’d like to use for your flowers. You can use one color or mix multiple colors to create a vibrant, multi-layered look. For a standard flower, stack about 6-8 sheets of tissue paper. The sheets should be the same size, so it’s a good idea to cut them into equal rectangles.
If you want a large flower, you can use larger pieces of tissue paper. If you want a smaller flower, cut the tissue paper into smaller rectangles. The size of your flower will depend on how large or small you cut your tissue paper.
2. Folding the Tissue Paper
Next, take the stack of tissue paper and begin folding it accordion-style. Start from one edge and fold the tissue paper back and forth, making each fold about 1 to 2 inches wide. Continue folding until you’ve folded the entire stack of tissue paper.
3. Securing the Center
Once you’ve folded the tissue paper flowers, take a pipe cleaner and wrap it tightly around the middle of the folded stack. Twist the pipe cleaner to secure it in place. This will serve as the center of your flower.
4. Cutting the Ends
To create the flower petals, use your scissors to shape the ends of the folded tissue paper. You can cut the edges into rounded or pointed shapes, depending on the look you’re going for. For example, rounded edges create a softer, more natural look, while pointed edges can give your flowers a more dramatic appearance.
5. Fluffing the Petals
Now comes the fun part! Gently pull apart each layer of tissue paper, starting from the top, and fluff it out to create the petals. Be gentle to avoid tearing the tissue paper. As you pull apart each layer, the flower will begin to take shape.
Continue fluffing the layers until you’ve opened all the petals. You can adjust the petals by bending and shaping them to your liking. If you want your flowers to look fuller, you can add more layers of tissue paper.
6. Attaching the Stem
If you used a pipe cleaner to secure the center of your flower, you already have a stem in place. If you want a sturdier stem, you can twist floral wire around the pipe cleaner for extra stability. You can also add leaves to the stem using green tissue paper or construction paper.
Creative Uses for Tissue Paper Flowers
Once you’ve mastered making paper flowers, there are endless ways you can use them in your decor and crafts. Here are a few creative ideas:
- Party Decorations: Tissue flowers make beautiful decorations for birthday parties, bridal showers, baby showers, and more. Hang them from the ceiling, arrange them in vases, or use them as centerpieces for a fun and colorful look.
- Wedding Decor: Use paper flowers to create a romantic and whimsical atmosphere at your wedding. You can make garlands, bouquets, or aisle decorations to add a personal touch to your big day.
- Home Decor: Tissue flowers can add a burst of color to any room in your home. Use them to brighten up a living room, bedroom, or kitchen. They also work well as wall hangings or table centerpieces.
- Gift Wrapping: Attach a tissue paper flower to a gift box or bag for a unique and decorative touch. It’s a great way to make your presents even more special.
- DIY Garlands: Create beautiful tissue paper flower garlands by stringing multiple flowers together. These garlands can be draped across walls, tables, or windows for an eye-catching display.
- Scrapbooking: Use paper flowers in scrapbooking projects to add texture and color to your pages. They can be a great way to personalize a scrapbook for a special occasion.
- Gift Flowers: Craft a small bouquet of paper flowers to give as a thoughtful, handmade gift for someone special. You can wrap the flowers in pretty tissue paper or place them in a decorative vase.
Conclusion
Tissue paper flowers are a simple yet beautiful way to add a pop of color and creativity to any occasion. Whether you’re crafting for fun, decorating a space, or making gifts, these flowers are an inexpensive and versatile option that can be customized to suit any style. With just a few materials and a little time, you can create stunning paper flowers that will bring joy and cheer wherever they are displayed.
From their historical roots to modern-day crafting, paper flowers have become a beloved DIY project for people of all ages. So, gather your materials, get creative, and start making your own paper flowers today!


