Crocheting a circle is a fundamental skill in crochet that opens the door to a variety of projects, from coasters and mandalas to hats and bags. Whether you’re a complete beginner or an intermediate crocheter looking to refine your technique, understanding how to crochet a circle is essential. This guide will walk you through the process step-by-step, breaking down the essential techniques and tips to ensure that your crochet circles come out perfectly every time.
What You’ll Need how to crochet a circle
Before starting, gather your materials:
- Yarn: You can use any type of yarn for this project. For beginners, it’s often easiest to work with a medium-weight yarn like worsted weight (4) because it’s thicker and easier to handle.
- Crochet Hook: The size of the crochet hook depends on the yarn you’re using. For worsted weight yarn, a 5mm (H-8) hook is typically a good choice, but always check the yarn label for recommendations.
- Stitch Marker: This is optional, but it helps you mark the beginning of your round, so you don’t lose your place.
- Scissors: For cutting your yarn when you’re done how to crochet a circle.
- Yarn Needle: Used for weaving in ends at the end of your project.
Basic Concepts: How to Crochet in the Round
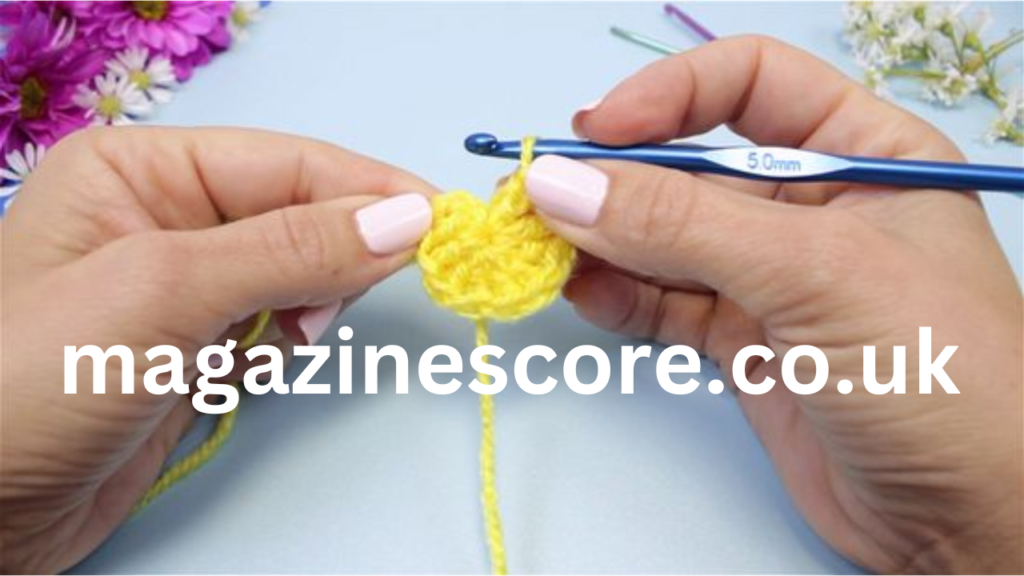
When you crochet a circle, you’ll be working in the round. In crochet, “working in the round” means that instead of turning your work back and forth, you’ll be crocheting continuously in a spiral, joining each round with a slip stitch.
There are two main techniques for crocheting a circle:
- Magic Ring (Adjustable Ring): This method is preferred because it allows you to pull the circle tight, eliminating any hole in the center.
- Chain Method: This is the traditional method where you make a foundation chain and crochet into the first chain to form the circle.
In this guide, we’ll focus on the Magic Ring technique, which is the most commonly used for circles, especially when making small to medium projects.
Step-by-Step Guide: How to Crochet a Circle Using the Magic Ring
Step 1: Make a Magic Ring
The first step in crocheting a circle is making the magic ring. It might sound complicated, but it’s quite simple once you get the hang of it.
- Hold the yarn tail in your left hand, leaving about 6 inches of tail.
- Form a loop by bringing the yarn over your fingers, with the working yarn (the yarn attached to the ball) going over the top.
- Insert your hook under the loop and grab the working yarn. Pull it through the loop.
- Hold the loop with your thumb and middle finger while you crochet into it.
Pro Tip: Practice making the magic ring a few times before starting your project to get comfortable with the motion.
Step 2: Single Crochet into the Magic Ring
Once you’ve made your magic ring, you’re ready to start crocheting into it. For a basic circle, we’ll use single crochet (sc), but you can use other stitches like double crochet or half double crochet if you prefer.
- Yarn over and pull up a loop through the magic ring, leaving two loops on your hook.
- Yarn over again and pull through both loops to complete a single crochet.
- Repeat this step to make 6 single crochet stitches (sc) into the magic ring.
Now, you have 6 single crochet stitches inside the magic ring.
Step 3: Pull the Magic Ring Tight
After crocheting your stitches, pull the yarn tail to close the magic ring tightly. This should eliminate the gap in the center of your circle.
Step 4: Join the Round
At this point, you’ve completed your first round of crochet. Now, it’s time to join the round. In crochet, you join the round by slip stitching into the first stitch you made.
- Insert your hook into the first single crochet stitch you made.
- Yarn over and pull through both loops on your hook to complete a slip stitch.
Congratulations! You’ve just completed your first round of a crochet circle!
How to Increase to Form a Larger Circle
To make your how to crochet a circle grow larger, you’ll need to add more stitches with each round. This is where the concept of “increasing” comes in.
In every round after the first, you’ll need to increase the number of stitches you make. Increasing is done by working two stitches into the same stitch from the previous round. Here’s how to increase in a circle:
Round 2: Increase Every Stitch
- Start by making your second round. Since you started with 6 stitches, you’ll need to double them by increasing in each stitch.
- To do this, crochet two single crochet stitches into each stitch of the previous round.
- After you finish the round, you should have 12 stitches.
Round 3: Increase Every 2nd Stitch
- Now that you have 12 stitches, you’ll increase every 2nd stitch.
- To do this, work 1 single crochet stitch in the first stitch, then 2 single crochet stitches in the next stitch.
- Repeat this pattern all the way around.
- After completing the round, you’ll have 18 stitches.
Previous article; Gameverse thegamearchives – Bridging Gaming’s Past, Present, and Future
Round 4: Increase Every 3rd Stitch
- Now increase every 3rd stitch. Work 1 single crochet in each of the first two stitches, then 2 single crochet stitches in the third stitch.
- Repeat this pattern for the entire round.
- After finishing the round, you’ll have 24 stitches.
Round 5: Increase Every 4th Stitch
- In the next round, increase every 4th stitch.
- Repeat the pattern of 1 single crochet in each of the first 3 stitches, then 2 single crochet stitches in the 4th stitch.
- After completing this round, you’ll have 30 stitches.
How to Continue Increasing
To make your circle grow in size, continue the pattern of increasing every additional stitch in each round:
- Round 6: Increase every 5th stitch (36 stitches).
- Round 7: Increase every 6th stitch (42 stitches).
Repeat this pattern as needed until your circle reaches the desired size. The key to keeping your circle flat and round is to increase evenly. Pay attention to how many stitches you increase by in each round, and ensure your increases are spaced evenly apart.
How to crochet a circle Flat
As your circle grows, you might notice it begins to curl or ruffle. If this happens, you might need to adjust your increasing pattern. A flat circle is achieved when the increases are just the right number, so be careful not to overdo it.
To keep your circle perfectly flat:
- Check your stitch tension: If your stitches are too tight, the circle might start to curve. Relax your tension a bit.
- Follow the increase pattern carefully, increasing at the right rate.
- Block your work: Once you finish, block your circle by dampening it and laying it flat to dry, which will help it keep its shape.
Common Problems and Solutions
- The Circle Won’t Lay Flat:
This can happen if you haven’t increased enough. Simply add more increases, making sure you follow the correct pattern of increasing every few stitches. - The Circle Has a Hole in the Middle:
If you’re using a magic ring but still have a hole, you may not have pulled the ring tight enough. Try pulling the yarn tail tighter and ensure the loop closes completely. - Uneven Stitches:
This can occur if your stitch tension isn’t consistent. Work on maintaining an even tension throughout the project for a smooth, even circle.
Creative Ideas for Using Crochet Circles
Now that you know how to croc het a circle, it’s time to get creative! Here are some project ideas that start with a basic circle:
- Coasters: Create small, decorative crochet circles as coasters for your coffee table.
- Mandalas: Larger, colorful crochet circles can be arranged in mandala patterns for wall hangings or blankets.
- Crochet Hats: Start with a crochet circle to make the crown of a hat, then continue working down to form the body.
- Granny Squares: Crochet several circles, then join them to make a larger piece for blankets, scarves, or even bags.
- Bags: A crochet circle can be the base of a bag or purse, expanding into the body of the bag.
Conclusion
How to crochet a circle is a versatile and essential skill in crochet, allowing you to create a wide variety of projects. From simple coasters to intricate mandalas and stylish hats, the possibilities are endless once you master this technique. By following the steps outlined in this guide and practicing regularly, you’ll soon feel comfortable crocheting circles in various sizes and using them for all kinds of fun and creative crochet projects.


![Pikruos.com: Your Go-To Hub for [Specific Benefit or Feature] Pikruos.com](https://magazinescore.co.uk/wp-content/uploads/2024/08/Untitled-design-9-1-735x360-1-480x253.webp)