Crocheting a blanket is a fun and rewarding project that can provide warmth, comfort, and a sense of accomplishment. Whether you are a complete beginner or have some experience with crocheting, this guide will walk you through the steps how to crochet a blanket from start to finish. You’ll learn about the essential tools, different techniques, and how to create a beautiful, cozy blanket that you can proudly use or gift to someone special.
Understanding the Basics of how to crochet a blanket
Before we dive into the specifics of crocheting a blanket, it’s important to have a basic understanding of crochet. Crocheting involves using a hook to interlock loops of yarn, creating a variety of textures and patterns. It is similar to knitting but uses only one hook instead of two needles. Crochet can be used for many projects,how to crochet a blanket, scarves, hats, and more.
Essential Tools for Crocheting a Blanket
To begin crocheting a blanket, you’ll need a few basic tools and supplies. Here’s a list of what you’ll need:
- Crochet Hook: The size of the hook you use depends on the thickness of the yarn you’re working with. A larger hook is typically used for thicker yarn, while a smaller hook is used for finer yarn. The hook size is usually indicated on the yarn label.
- Yarn: Choose a yarn that is comfortable to work with. Acrylic, cotton, or wool yarns are popular choices for blankets because they are soft, durable, and easy to care for. The thickness (or weight) of the yarn will determine how dense and warm the finished blanket will be.
- Scissors: You’ll need scissors to cut the yarn when you finish your blanket or need to change colors.
- Yarn Needle: A yarn needle is used to weave in any loose ends of yarn once the blanket is complete.
- Measuring Tape: This tool will help you measure the size of your blanket to ensure it’s the desired length and width.
Once you have these supplies, you’re ready to start crocheting!
Choosing the Right Yarn for Your Blanket
When choosing yarn for your crochet blanket, consider the following factors:
- Yarn Weight: Yarn comes in different weights, ranging from lace weight to super bulky. For a blanket, it’s generally best to choose a worsted weight or bulky yarn. These yarns are thick enough to create a cozy blanket but not so thick that they become difficult to work with.
- Fiber Content: Yarn can be made from various fibers, such as acrylic, cotton, wool, or a blend of these. Acrylic is a popular choice because it is affordable, easy to care for, and available in many colors. Wool offers warmth, while cotton is breathable and soft, making it suitable for lighter blankets.
- Color: Choose a color or color combination that suits your style and the room where the blanket will be used. You can opt for a solid color, a gradient, or a multi-color pattern, depending on your design preferences.
How to Choose a Crochet Pattern
There are many crochet blanket patterns to choose from, ranging from simple stitches to more complex designs. If you’re a beginner, it’s best to start with a basic pattern that uses simple stitches like the chain stitch, single crochet, or double crochet.
Here are a few popular crochet stitch patterns that are commonly used in blankets:
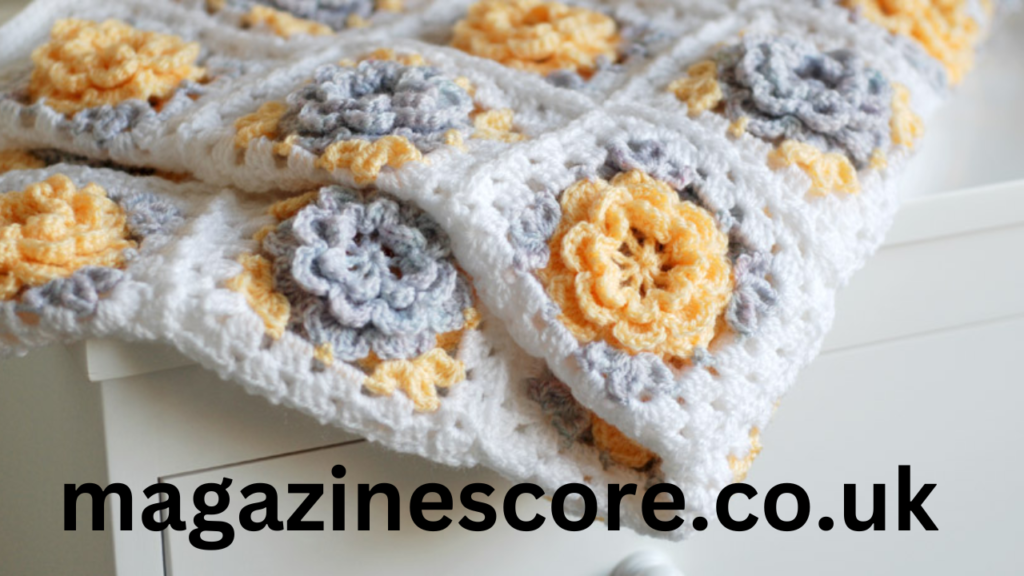
- Granny Squares: Granny squares are a classic crochet motif made up of multiple rounds of stitches. These squares are then joined together to form a blanket. Granny squares allow you to experiment with different colors and designs.
- Ripple or Chevron: This pattern creates a wavy effect with alternating peaks and valleys. The ripple pattern is achieved by increasing and decreasing the number of stitches in each row.
- Simple Solid Blanket: For beginners, a simple blanket made up of rows of single crochet or double crochet stitches is a great way to practice your technique. You can add texture or borders to make it more interesting.
Starting how to crochet a blanket
The first step in crocheting a blanket is creating the foundation chain. This is the series of loops that form the base of your blanket. The number of chains you’ll need will depend on the width of the blanket you want to make and the stitch pattern you’re using.
Previous article; Cable Pullover The Ultimate Guide to Mastering This Exercise
- Start with a Slip Knot: Begin by making a slip knot with the yarn. This knot is used to secure the yarn to the crochet hook.
- Create the Foundation Chain: Next, you’ll make a chain. To do this, yarn over the hook and pull through the loop on your hook. Repeat this process until you have the desired length. The foundation chain should be long enough to cover the width of your blanket.
How to Determine the Size of Your Blanket
The size of your crochet blanket depends on how many chains you make at the beginning. Here are some common blanket sizes for reference:
- Baby Blanket: 30″ x 36″ (76 cm x 91 cm)
- Throw Blanket: 50″ x 60″ (127 cm x 152 cm)
- Full/Queen Blanket: 90″ x 90″ (229 cm x 229 cm)
- King Blanket: 108″ x 108″ (274 cm x 274 cm)
Check your yarn’s recommended gauge to make sure you’re starting with the correct number of foundation chains for your blanket’s size. You can also adjust the number of stitches to change the size, but keep in mind that a larger blanket will require more yarn and time.
Crocheting the Blanket
Once you’ve created your foundation chain, you can begin crocheting the body of the how to crochet a blanket. The basic technique involves working rows of stitches back and forth, building up the fabric of your blanket.
Step 1: Turn Your Work
When you reach the end of a row, you’ll need to turn your work around to start a new row. This is done by flipping the piece so that the other side is facing you.
Step 2: Start Each Row with a Turning Chain
At the beginning of each new row, you’ll need to add a turning chain. The height of the turning chain depends on the stitch you’re using:
- For Single Crochet (sc): Chain 1.
- For Half Double Crochet (hdc): Chain 2.
- For Double Crochet (dc): Chain 3.
These turning chains create the height needed for the first stitch of the new row.
Step 3: Continue Working the Pattern
Now, simply work the stitches across each row. For example, if you’re working with a single crochet stitch, insert the hook into the next stitch, yarn over, pull up a loop, yarn over again, and pull through both loops on the hook. Repeat this process across the row, and then turn your work and repeat for the next row.
If you’re following a specific stitch pattern (such as a ripple or granny square), follow the instructions for increasing, decreasing, or changing stitches as necessary.
Step 4: Keep Track of Your Rows
It’s important to keep track of how many rows you’ve completed to ensure your blanket stays the right size. You can count the rows manually or use a stitch marker at the beginning of each row.
Adding a Border how to crochet a blanket
Once you’ve finished crocheting the main portion of your blanket, you can add a border to give it a polished, finished look. Borders can be simple or intricate, depending on your preference.
Here’s how you can add a basic border to your blanket:
- Choose a Border Stitch: A simple border can be made using single crochet, double crochet, or a combination of both. You can also experiment with more decorative stitches, like shells or picots.
- Work Around the Edges: Start at one corner of your blanket and work your border around the edges, adding stitches evenly along the sides. When you reach a corner, make a few extra stitches to help the border turn smoothly.
- Finish the Border: Once you’ve worked the entire border, fasten off your yarn by cutting it and pulling it through the last loop. Use your yarn needle to weave in any loose ends.
Weaving in the Ends
After finishing your crochet blanket, you may have several loose yarn ends. These are the tails from starting and ending the yarn or changing colors. To secure these ends, use a yarn needle to weave them into the stitches of the blanket, making sure they are hidden and won’t unravel.
Tips for Crocheting a Blanket
- Practice First: If you’re new to crochet, practice with smaller swatches before diving into a full blanket. This will help you get comfortable with holding the yarn and hook and learning the stitches.
- Check Your Tension: Make sure your tension is consistent throughout the project. If the stitches are too tight or too loose, it can affect the look and feel of your blanket.
- Use Stitch Markers: Stitch markers are helpful for keeping track of your stitches and rows, especially if you’re working on a complex pattern or changing colors.
- Take Breaks: Crocheting a large blanket can take time, so be sure to take breaks to avoid fatigue. Stretch your hands and wrists regularly to prevent strain.
- Join in the Round: If you’re making a blanket in the round, use a stitch marker to keep track of where the round begins.
Conclusion
How to crochet a blanket is an enjoyable and creative way to make a personal and meaningful item. By following the steps outlined in this guide, you can create a beautiful blanket that provides warmth and comfort. Whether you’re making a cozy throw for your couch or a baby blanket as a thoughtful gift, crochet gives you the opportunity to personalize your project.


